July 29, 2010

Geometrically Inspired

I just wanted to share my excitement with all of you. I got a Gypsy!!!!!! I'm so excited and I've been playing with my new toy for a couple of days now. I must say I love it more than I could have ever imagined! The funny thing was I didn't want one because the size of the screen and also lacks many features that are in SCAL. After playing with it you need BOTH; they work hand in hand.

I got inspired by these images to create a geometric background for my card.
Sources: Ohdeedoh and The Bella Life


Once I figure out how to share cut files from Gypsy I will post it on my side bar. Please check there in the near future.

If you were inspired by this post and created something please email me. I would love to see your projects!

July 27, 2010

Make Your Own Appliques Using Cricut


I've given up on cutting fabric in my Cricut months ago. I tried using butcher paper and Heat'n Bond and that didn't turn out too great for me. I've decided to give this project one more try using a Pellon Clear Fuse 800 and it went so much better. I got it at JoAnns. I don't remember whose idea this was but I know she's from Cricut message board. I couldn't find her blog. Sorry!

Please read instruction that comes with the clear fuse 800. Trust me you don't want to screw this up. It will tell you what settings your iron should be and how long you should iron this baby for.

Tips from me:

-1- Cut the clear fuse 1/2" smaller than your fabric; why? you don't want to get the sticky stuff all over your iron and ironing board.
-2- Put rough side of the fuse to the back side of the fabric. Make sure to press firmly with iron instead of moving the iron around like a mad woman.
-3- Let the fabric cool completely before peeling. Patience will pay off! Trust me...
-4- TEST the cut on old fabric or ugly fabric you bought back in 1999 and thought it was the cutest thing ever.
-5- Make sure there aren't any bubbles when you place the fabric on the mat. Smooth them out with the scrapper or your fingers.

Cricut Settings:
(Edited on July 28th.)
-1- Blade Depth = 4
-2- Pressure = 4
-3- Speed = 4
-4- Multi cut = 2

Note: Before you send me hate emails please try -1/+1 on your settings. Every machine is a bit different! If it still doesn't work email me.

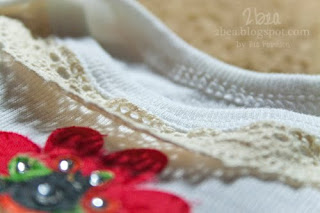
As you know I'm all about the details! I added some lace around the neckline. The ruffle stem and leaf is from the same ribbon I had in my stash. I added the rhinestones for the finishing touches. I used the EK Success hot-fix tool for this project. Would I recommend it? No! It works fine but not great. The darn rhinestones got stuck all the time and so I had to use flat tip instead. Since this is my blog I'm going to take 2 seconds to vent. Their customer service sucks! I emailed the company and never heard back from them. There! I just had to let y'all know that!

Moving on...

I would try this one instead! It's by Darice. Now before you send me another hate email please note that I have not tried this tool. Just heard great things about it from other people. Take it for what its worth.
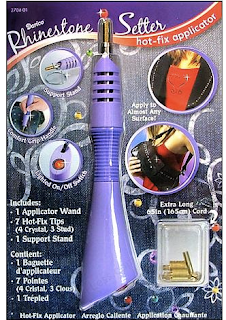
I hope you'll give this project a try.

If you have any other tips for cutting fabric using Cricut please let me know.


July 26, 2010

Midnight Spell Stack by DCWV

OMG! This stack is amazing! My favorite Halloween papers thus far. There are several with glitter and foil. MMMmmmmmmmmm! I can't wait to use these babies!
Now that I'm thinking about... it's going to be hard for me to cut this paper!
It must be done Bea!

I got this stack at J's. Hopefully you can find some at your local J's.


July 25, 2010

SWAP virgin

Did you see? Did you see?! Queen is hosting a SWAP. If you are ready for some serious fun go here to get all the details regarding SWAP.
This will be my first SWAP! Ahhhh so excited!
There are so many of you out there that are so talented and I'm looking forward to touching and admiring your work! This will be cool to be able to touch and feel instead of drooling on my computer screen. Thanks Kathy for doing this!


July 24, 2010

Camera Strap Cover!

Here's another sewing project inspiration for you! How many of us own a camera or cameras?!?! I know several people who has the exact camera as we do!
I decided to spice things up a bit.


No more losing your camera at the crop or swamp or let alone at your home. Can you imagine not being able to locate your camera when this baby is on? I didn't think so! Problem solved! So get your sewing on my lovelies! If you don't sew.... take a deep breath do not panic. I found some amazing online stores that sell them. I do not know these people. I just like the covers. Take a lookie look here, here, and here!


July 23, 2010

How to Add Blinkie to Blog OR Add MB Signature

I will be working on the blinkies for the winners SOON. You should receive them no later than the end of next week.

For those that didn't win I'm so sorry. You can still learn a few things from this video and tweak it to your needs. I hope this is somewhat helpful to you. If you have any questions please email me. The email link is on the side bar at the very top of the page.

Congrats again to the winners! =)


July 22, 2010

Congratulations!

I feel so honored to design a blog blinkie for Kathy at Paper Phenomenon! If you love paper crafting you'll have to check her out. She's amazing. Let me tell you this lady has magic fingers. I swear. If you don't believe it go check her out for yourself.

Photobucket


I offered personalized blinkies to Kathy's USTREAM viewers and the following are the lucky winners! Congratulations ladies!

1. Penny M.
2. Wende B.
3. DAJ731
4. Christy Rush
5. Shari
6. Carol

(Giveaway is now closed. I will email the winners!)
And because I'm feeling very generous right now. For the first SIX (6) yes you heard right 6 people to leave me comments on this post with the details of what they want on their blinkie will receive a personalized blinkie from me!!! Don't forget to leave me your email.
No details = no blinkies. Simple! =)
I need to know the color(s), designs, blog URL, wordings, and etc.

Now that is some serious love! You don't have to have a blog. It can be for your Cricut Message Board signature and etc.
Have a wonderful night!


July 17, 2010

YouTube Inspiration


I got this idea from Rina and Jo from YouTube. I just happened to have one canvas left in my craft room. This is a really cute home decor project.

I painted the canvas with glimmer mist. I also defined the edges by stamping text around the frame. For more textures I added mesh material on the left side of the canvas and more laces on the bottom and on the right side of the frame. I made all of the flowers and leaves using fabric scraps.

I hope you all will give this a try. It's really fun and inexpensive if you are already a scrapbooker.