Showing posts with label Fabric. Show all posts

April 20, 2011

Hooter Hider by Me

I must put it out there that my husband is the most patient/supportive person ever! I always come up with projects after projects and he has been so supportive! My sewing machine has been on our dining table for weeks! Pile of fabric and scraps are everywhere! Not a word of complaint!

He knows that at the end of the day, "crafting" is what makes me sane!

So what did I sew? A hooter hider!
(I made this a few weeks ago but forgot to post.)
I got the tutorial from here.
I didn't follow the instruction to the T but close enough. I made some changes; added the lining and bow instead of d-ring.

February 24, 2011

Bitten

I think I got bitten by the sewing bug! All I want to do is sew sew sew! I've done just that in the past two days. Here's one of the dresses that I have sewn! I got the pattern from here.

I had fun sewing this dress.
I'm going to make a bunch more...

What a perfect baby shower gift!


September 9, 2010

Grown-Up Bib

I'm a 'grown-up' who loves to wear bib... bib necklace! Noticed I said grown-up... I didn't say mature. hehe
What do you get when you combine felt + satin + ribbon + rhinestones + buttons + brads?

You get this cutesy necklace bib!

I used sizzix die to cut the 2 felt flowers.

July 27, 2010

Make Your Own Appliques Using Cricut


I've given up on cutting fabric in my Cricut months ago. I tried using butcher paper and Heat'n Bond and that didn't turn out too great for me. I've decided to give this project one more try using a Pellon Clear Fuse 800 and it went so much better. I got it at JoAnns. I don't remember whose idea this was but I know she's from Cricut message board. I couldn't find her blog. Sorry!

Please read instruction that comes with the clear fuse 800. Trust me you don't want to screw this up. It will tell you what settings your iron should be and how long you should iron this baby for.

Tips from me:

-1- Cut the clear fuse 1/2" smaller than your fabric; why? you don't want to get the sticky stuff all over your iron and ironing board.
-2- Put rough side of the fuse to the back side of the fabric. Make sure to press firmly with iron instead of moving the iron around like a mad woman.
-3- Let the fabric cool completely before peeling. Patience will pay off! Trust me...
-4- TEST the cut on old fabric or ugly fabric you bought back in 1999 and thought it was the cutest thing ever.
-5- Make sure there aren't any bubbles when you place the fabric on the mat. Smooth them out with the scrapper or your fingers.

Cricut Settings:
(Edited on July 28th.)
-1- Blade Depth = 4
-2- Pressure = 4
-3- Speed = 4
-4- Multi cut = 2

Note: Before you send me hate emails please try -1/+1 on your settings. Every machine is a bit different! If it still doesn't work email me.

As you know I'm all about the details! I added some lace around the neckline. The ruffle stem and leaf is from the same ribbon I had in my stash. I added the rhinestones for the finishing touches. I used the EK Success hot-fix tool for this project. Would I recommend it? No! It works fine but not great. The darn rhinestones got stuck all the time and so I had to use flat tip instead. Since this is my blog I'm going to take 2 seconds to vent. Their customer service sucks! I emailed the company and never heard back from them. There! I just had to let y'all know that!

Moving on...

I would try this one instead! It's by Darice. Now before you send me another hate email please note that I have not tried this tool. Just heard great things about it from other people. Take it for what its worth.

I hope you'll give this project a try.

If you have any other tips for cutting fabric using Cricut please let me know.


July 10, 2010

Bohemian-Chic Headband

If you don't have Tim Holtz Tattered Florals Bigz die you have to go get it right now! This die has so many uses! OMG! I cut so many materials on it already and can't wait to show you more projects.

Here's a headband I made last night. Gather your coordinating fabrics and I will post the tutorial soon!

Oh and if you are interested in hybrid scrapbooking click here for my latest video.

Have an awesome weekend!


June 4, 2010

Oh Sew Cute Flowers!

OK ladies and gents (a few of you out there) I have some cute and simple flowers tutorial coming up. These are perfect for anything; scrapbook layouts, cards, hair accessories, quilt, and whatever else that needs some glam.
Keep checking back here or you could subscribe to my blog or Youtube channel that way you will know the moment it goes on live! Yay thank you technology!

While I'm still trying to put a video together go grab some fabric scraps, thread, needle, and buttons. I can't promise that it will go up today... summer is a bit interesting around mi casa.


May 15, 2010

Embellish Y-O-U Part II

First and foremost I would like to apologize for not keeping up with my blog for those of you who read it religiously. I know there are 2 of you out there. hehe.
Here is another flowers bib shirt I made the other day. I thought it would be fun to share and get your creative juices flowing again. These are real simple to make and there are plenty of tutorials out there on the internet. I don't have any vintage buttons or brooches or this bib would have been even more amazing. If you don't want to put it on your shirt you can attach it with a ribbon or chain and turn it into a necklace. How cool is that? The bib necklace is hot right now. Join in the fads and make a statement!

Here it is up close.


Flowers bib goodness on my shirt.


Here's a sneak peek of the up coming project - mini album.


April 25, 2010

Embellish y-o-u!

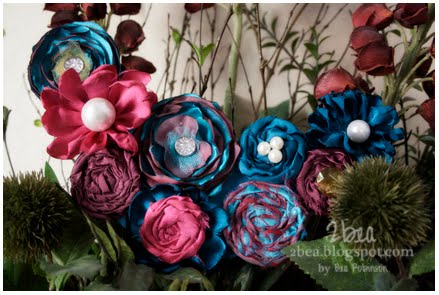
Hello creative bloggers out there! I had to share these fabric flowers that I made awhile back but didn't have time to blog about. They are super affordable and fun to make! Who doesn't have some left over fabric and glue lying around the house? That's what I thought! Sorry no video tutorial on this project because I feel silly showing you how simple it is to make. All you need is some fabric scraps and Fabri-Tac. I guess hot glue would work too. I chose felt for the base of the flower but if you are going to use it on scrapbook pages you can use cardstock as a base too. What you'll need to do is glue the fabric strip into the center of the base and start twisting and gluing away until your base is full! Viola you got yourself a beautiful flower. Embellish the center of the flower using pearls, gems, crystals, whatever your lil' heart desires.

I love the versatility this gives me. I can don these flowers pretty much anywhere.... yes yes even on my body! (*wink)

I hope you give this a try and don't forget to email me some pictures!